Wednesday, January 30, 2013

Paper Tube Stamped Snowman

Source 'n' inspiration: http://www.makeandtakes.com/paper-tube-stamped-snowman


Snowman by EE     Snowgirl by EE    Snowkitty by EE


Craft Supplies Needed for Paper Tube Stamped 

Snowmen/Ladies/Kitties, etc.:


  • paper towel tube (Ex: toilet paper roll, paper towel roll, aluminum foil roll, etc. We used three different sizes of paper tubes: small for the head, medium size for the mid section and large for the bottom.
  • plate or small bowls for paint
  • scissors
  • heavy cardstock paper, any color or size
  • white or silver paint
  • various colors of paint for the details (frilly scarf, Hooked nose, brass buttons, pirate hat, etc.)
  • different thicknesses of paint brushes for details


___________________________________________________________________

Nothin' beats fine aaaaart! Effervescent Ethel 30/01/13


Thursday, January 24, 2013

Torn Paper Snow People (or Snow Kitty)

 Sources/Google images for inspiration and guidance: https://www.google.com/search?hl=en&q=snow+people+torn+paper+pictures&bav=on.2,or.r_gc.r_pw.r_qf.&bvm=bv.41248874,d.cGE&biw=1283&bih=1222&um=1&ie=UTF-8&tbm=isch&source=og&sa=N&tab=wi&ei=lhAAUdizJ6GriAKAgoHABw


Our captain and artistic director of the Ebony Oyster Cap'n Mad Ellen keeps us entertained with an unlimited selection of craft projects!


Need:

-white construction paper
-darker background paper (we used a medium purple shade)
-glue
-scrap paper in various colors to dress your snow person
-crayons, markers for details (eyes, nose, etc.)

Optional craft items:

-hole punch to make eyeballs or buttons
-glitter or fake snow
-cotton balls to make snow

TORN PAPER SNOW KITTY crafted by Effervescent Ethel


_______________________________________________________________


Tuesday, January 22, 2013

Snowy Handprint Winter Tree

source: http://crafts.kaboose.com/snowy-handprint-tree.html


Cap'n's log: We used white and iridescent loose glitter in place of granulated sugar. The main reason
being that we have a vermin problem on board our dear lady the Ebony Oyster and using sugar would have only contributed more to the infestation (rats, ants, etc.).


Snowy Handprint Winter Tree by Effervescent Ethel


Difficulty: Very Easy
Age: 3 and up


What you'll need:


  • 1 sheet light blue construction paper
  • 1 sheet white copy paper
  • Brown acrylic craft paint
  • Glue stick (we used regular clear glue)
  • Scissors
  • 3 tablespoons granulated sugar

How to make it:


  1. Lay white paper sideways (landscape) and cut the paper in half using a curvy cut. Place paper across the light blue construction paper. Use the glue stick to attach it to the bottom third of the blue paper.  Use scissors to trim off any excess white paper. 
  2. Paint child's palm and fingers with brown paint. Have child spread out his/her fingers then press his/her palm and fingers down onto the paper. Wash off child's hand.
  3. Use finger to paint on a "tree trunk" under the palm print. 
  4. Use the glue stick to apply glue to the fingers (branches) and snow (white paper). Sprinkle all glued areas with granulated sugar. Carefully lift paper and tap off excess sugar over the sink or a piece of wax paper. (To make the snow flakes, the crafty ones on  board the Ebony Oyster made small dots with a finger dipped in glue.)
  5. Use glue stick to draw dots or small circles onto the blue paper, sprinkle with sugar again and tap off excess. 

Tips:


  1. Construction paper is perfect for impromptu craft projects.
  2. Poster paint will work in place of acrylic craft paint.
  3. Be sure to wash child's hand with soap and water before continuing with the project so that the paint will come off easily.


Wednesday, January 16, 2013

Red Cardinal en papier

This quick craft project was spotted in the children's book 'Snow Shapes  A Read-And-Do Book' by Judith Moffatt


Need:


-red paper: construction paper, card stock, scrapbook paper or similar (any type of paper as long as it is not too difficult to fold)^^we used scrapbook paper on sale for .20 cents a sheet. I purchased two sheets in case of any craft accidents.
-scrap of white paper
-scrap of black paper
-scissors
-clear glue
-hole punch
-*red feathers (either real feathers or feathers made from red paper) 
-string, yarn or clear polyester thread to hang

*optional


Total cost of craft project: approximately US$1.40 I purchased the feathers for $1.00 pkg. using a 50% off coupon at JoAnns.


Tip: Make a sample bird first using a piece of scrap paper.


1. Fold a piece of red paper in half (the paper can be either square or rectangle.) The smaller the piece of paper the smaller the bird.


2. Fold the bottom left hand corner up to the center fold of the paper. Repeat on the other side.


3. Cut off the excess paper on the side. You now have a triangle shape.


4. Make a cut through both thicknesses of paper as shown.


5. Fold one side of the paper up to create a wing. Repeat the same on the other side.


6. Cut out a small triangle to create a head and neck shape on the bird as shown. 


7. Use a scrap of black paper and add a black triangle for the cardinal's face. Glue the triangle on close to the beak. Make one hole punch from the white scrap paper and glue it onto the black triangle for the cardinal's eye(s).  Note: We did this step on both sides of the cardinal.

8. If desired, glue red feathers on the wing and the tail; snip off a piece of feather for the cardinal's crest.


9. Make a hole punch near the wing to hang your bird. See small dot placement on the last diagram above.


__________________________________________________________


Saturday, January 12, 2013

Easy and Quick Sewing Machine Cover

source: http://www.mydecoupagedlife.com/2012/08/easy-sewing-machine-cover-tutorial.html


(Photo from the site^^.)


Cap'n Mad Ellen's note: For this project I used Dia de los Muertos' fabric purchased at JoAnns. The reverse fabric was purchased at Walmart and it is 'Jacobean Yellow' from the Heritage Studio. I wanted to add an embellishment as seen in above photo. Searching through the Ebony Oyster's bilge I found golden yellow ribbon very similar in color to 'Cempasuchitl' aka  'flor de muerto'/(marigolds in English). First, make a running stitch on one long edge of the ribbon. Gather into circle and sew together at ends to make a flower. Et voila! A cempasuchitl/marigold flower to embellish my new sewing machine cover!

(Source for marigold flower tutorial: http://cqmagonline.com/vol08iss01/articles/893/index.shtml)


(Text from the website.)


"Supplies Needed:
  • 2 pieces of coordinating fabric
  • Ribbon
  • Thread
  • Embellishment (totally optional but it makes it that much cuter!)

Step 1: Cut each piece of fabric to 27” x 15”. I have a pretty standard machine, but you can always check the dimensions of yours and adjust the measurements accordingly.


Step 2: Cut your ribbon into 6 10” pieces. Place your fabric right sides together. On one long end place a piece of ribbon 6” from each side. Pin so that the ribbon is in between the two pieces of fabric like so:

On the other long end pin a piece of ribbon 2 1/2” from each side and again at 9” from each side. Does that make sense? Here’s a diagram:
ribbon diagram


Step 3: Sew the two pieces of fabric together (right sides together) with ribbons pinned in place, leaving a 3” space for turning (Cap'n ME: First determine which side will be the front of the sewing machine cover then leave a 3" space for turning on the *back* of the cover).

Step 4: Turn the fabric right side out. Press. Top stitch around the edge, making sure to sew the corner you left open.

Step 5: You can add an embellishment if you want. I just added a felt flower, but it can definitely be left plain."

________________________________________________________________________________


                                                                                                          11 January Year of our Lord 1713

Cap'n's NOTES: only four pieces of ribbon were added by sewing two ribbon pieces on each side and about 6"  from each edge. The diagram above may be a bit confusing. Take one piece of fabric and lay it down flat printed side up. Pin the ribbon pieces onto the fabric with the ribbon piece ends facing to the middle of the fabric piece. Pin. Lay the second piece of fabric on top printed side down. Pin the two pieces together and sew leaving the 3" opening to turn. 

 A last minute change due to the fact I left my spool of ribbon at home was replacing it with another golden yellow ribbon that was 1" wide. I may add topstitching later...The main fabric was pieced together on the back (seam to the back) because I forgot to take into consideration that the fabric is printed in one direction. The ends of the ribbon strips were treated with Fray Check.Total price to make this sewing machine cover was approximately US$5.00.


_______________________________________________


¡Buen hecho, Capitàn Mad Ellen!


_________________________________________________________________


Thursday, January 10, 2013

Wood Craft Stick Snowflakes


 The snowflakes I saw on display earlier today used straight edged standard  craft sticks but we chose to try 'wooden skill sticks' which are notched on the edges.  We the Small Crafty Crew (aka The Glitterati Guild) were greatly inspired by the snowflake-like design on our own Ebony Oyster's ship's flag (see above). These particular craft sticks are readily available in any craft store, Walmart, etc. Considering our current location this is the closest we'll get to seeing the real deal for many months.


Staying up all night while waiting for the glue to dry.


*If desired, you can first spray paint (or use craft paint) the wood sticks with a color of choice. Set aside to dry. Do this first before glueing the wood pieces together. It's your decision whether to [spray] paint one side or both sides.


Need:


-wooden skill sticks or craft sticks
-clear glue
-glitter in assorted colors
-glitter paint " " "
-iridescent sequins
-string or fishing line to hang (optional)


Other decorating ideas:

-*spray paint (silver, white, or gold) or craft paint
-scraps of metallic ribbon
-small buttons


(Spray paint the wood pieces. Set aside to dry. )

Glue wood pieces together in a snowflake design. I would suggest using no more than 4-5 wood pieces. After applying the glue, allow the snowflakes to dry at least 2 hours but preferably overnight.

Decorate as desired.

Set aside to dry. Once the snowflakes are dry you can hang them up with yarn, thread, halyard, fishing line, etc.


Wednesday, January 2, 2013

The Gratitude Jar (2013 Edition)


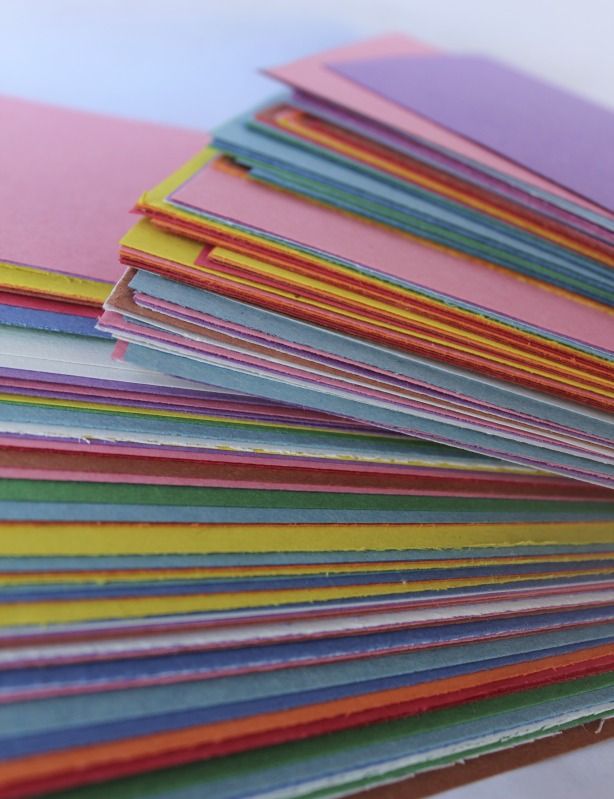
"While a basic arts & crafts project, it’s the simplicity of this DIY (Do It Yourself) that makes it beautiful. Each person writes down what they are grateful for in their everyday lives on a slip of paper (it can even be a repurposed scrap!) and drops it into a jar. If you’re inspired to doodle or your tot can’t yet read/write, then you can draw pictures instead. And, of course, there is no limit to how many slips everyone can share because there is much to be thankful for no matter how big or small—parents, spouses, siblings, friends, children, chocolate, jobs, health, happiness, hobbies, toy cars, movies, pets, pie, sports, sunshine….
You can create your gratitude jar and fill it all year... Not to mention, scientific research has found that the practice of focusing on gratitude a few minutes each day tends to positively influence attitudes, increase happiness and joy, foster relationships, encourage compassion, and improve overall well-being including immunity.
So, 
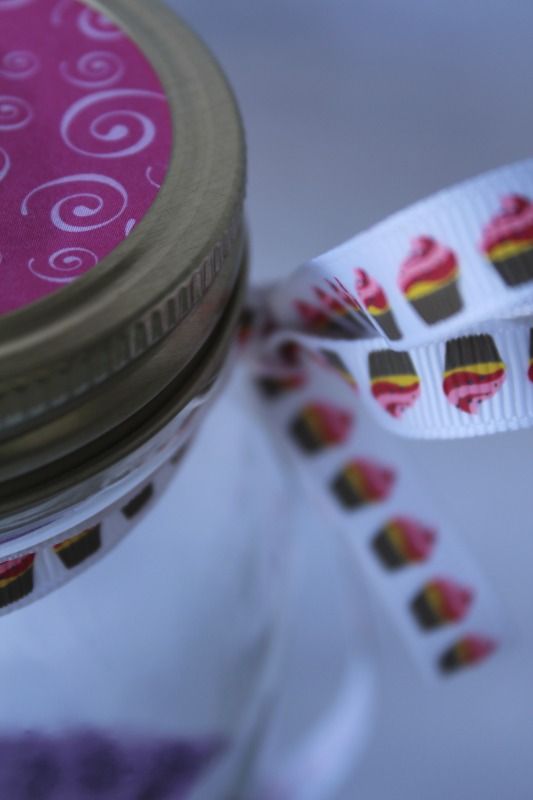
grab your mason jars (or bowls or boxes), recycled paper, and pens and celebrate life’s blessings!"


_________________________________________________________________________________


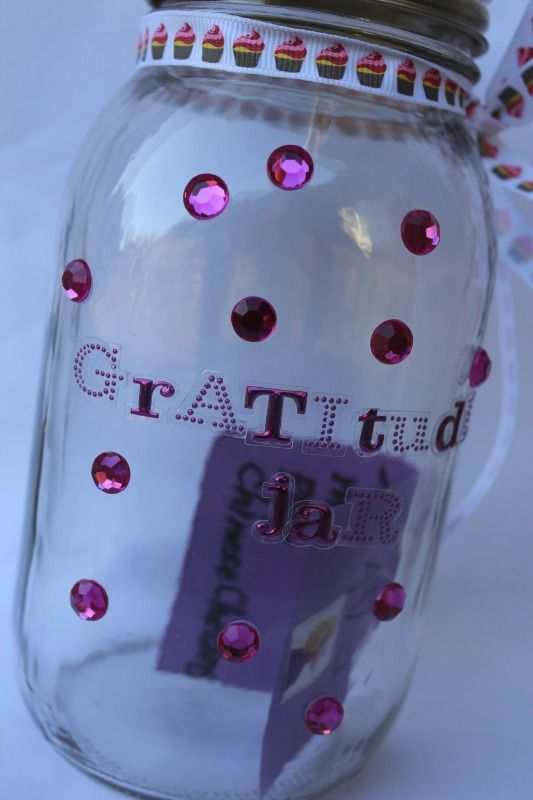
Effervescent Ethel chose the accessories/color scheme for this simple craft project. For her first slip of paper,  EE wanted to draw a picture and add a sticker. The first gratitude note reads: Mommy (aka Mad Ellen) taught me how to play Chinese Checkers. It was signed by Effervescent Ethel and I also dated the slip of paper including the day of the week. 


Total cost approximately: US$3.00.

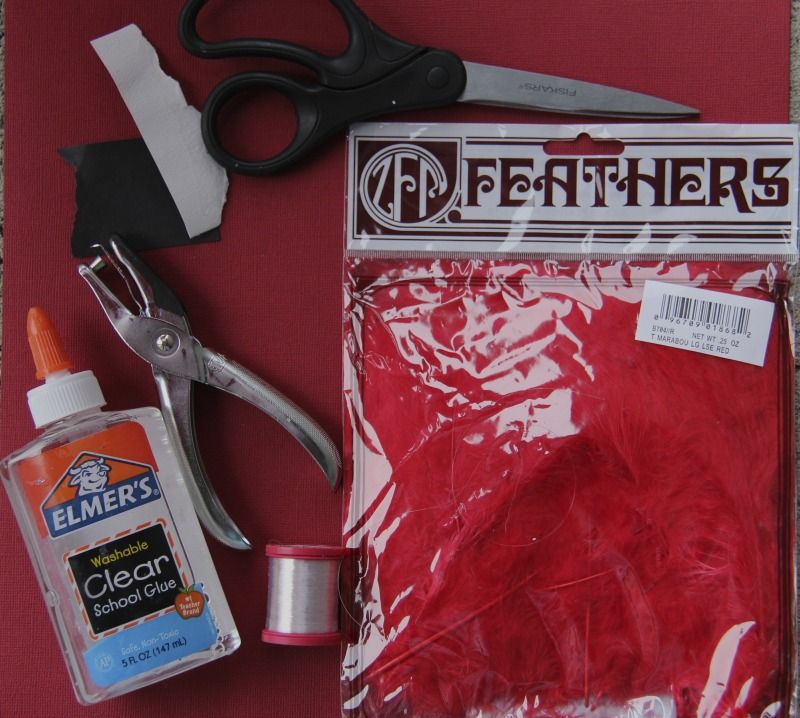
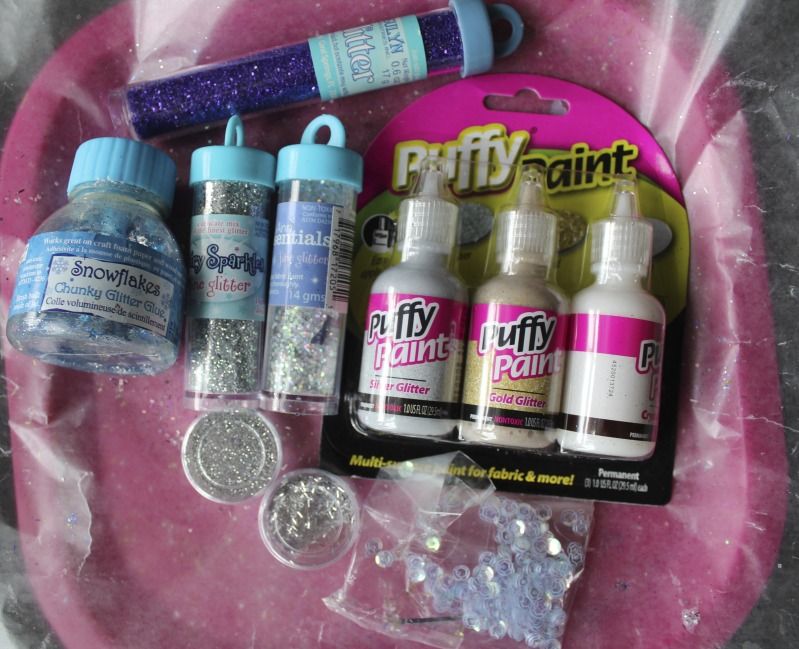
Materials used (and are only suggestions):

-Mason jar
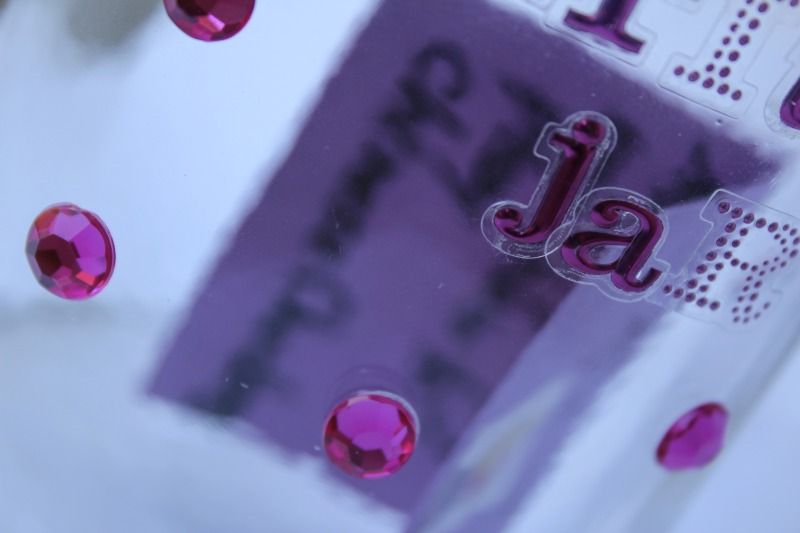
-self-adhesive letters
-self-adhesive pink "gem" dots
-narrow grosgrain ribbon
-scrapbook paper (for the lid) <<--don't forget the glue
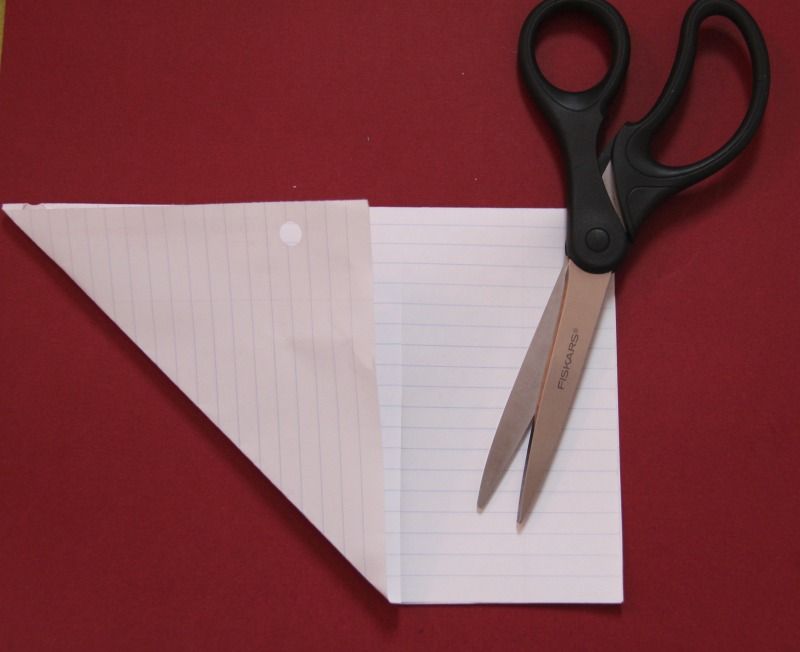
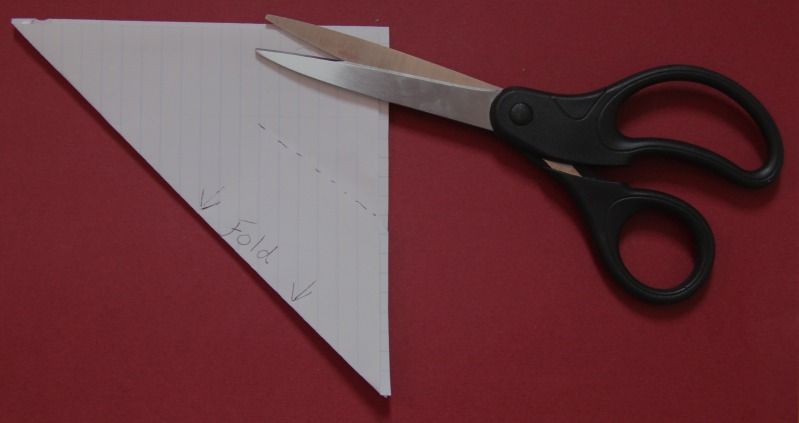
-construction paper in various colors (for the slips of paper)
-(optional) stickers to decorate the slips of paper  

All materials minus the stickers were purchased at JoAnns' Fabrics.


_______________________________________________________


Yo ho, yo ho, a pirate's life for me. 
We pillage plunder, we rifle and loot. 
Craft up me 'earties, yo ho. 
We kidnap and ravage and don't give a hoot. 
Craft up me 'earties, yo ho. 

Yo ho, yo ho, a pirate's life for me. 
We extort and pilfer, we filch and sack. 
Craft up me 'earties, yo ho. 
Maraud and embezzle and even highjack. 
Craft up me 'earties, yo ho. 

Yo ho, yo ho, a pirate's life for me. 
We kindle and char and in flame and ignite. 
Craft up me 'earties, yo ho. 
We burn up the city, we're really a fright. 
Craft up me 'earties, yo ho. 

We're rascals and scoundrels, we're villians and knaves. 
Craft up me 'earties, yo ho. 
We're devils and black sheep, we're really bad eggs. 
Craft up me 'earties, yo ho. 

We're beggars and blighters and ne'er do-well cads, 
Craft up me 'earties, yo ho. 
Aye, but we're loved by our mommies and dads, 
Craft up me 'earties, yo ho. 
Yo ho, yo ho, a pirate's life for me.