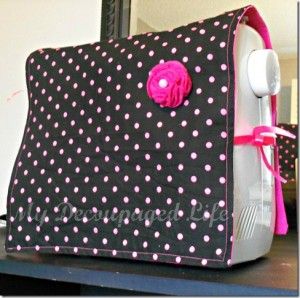
(Photo from the site^^.)
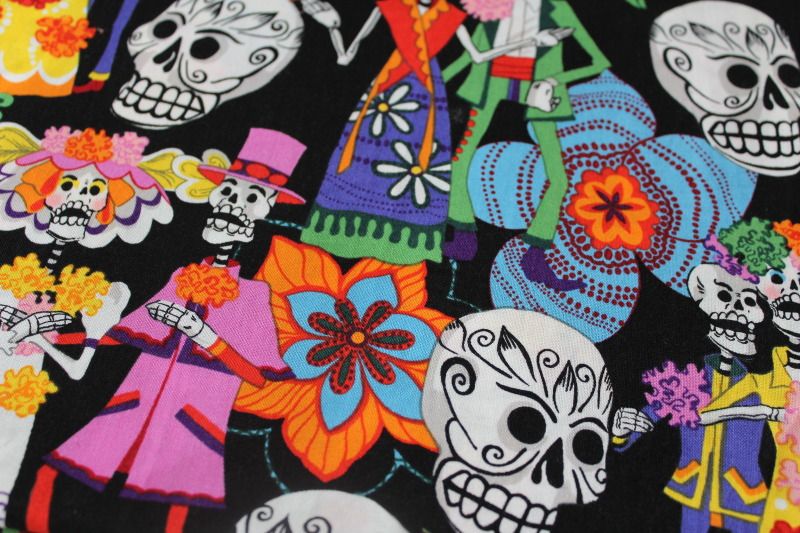
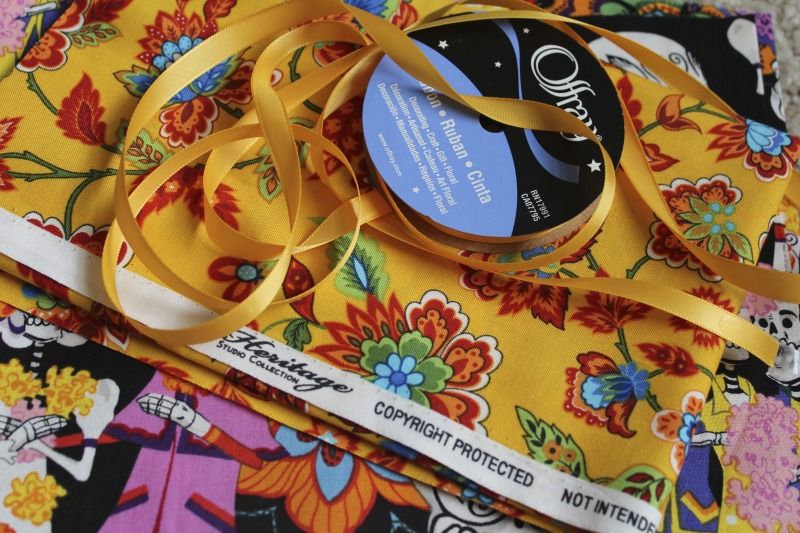
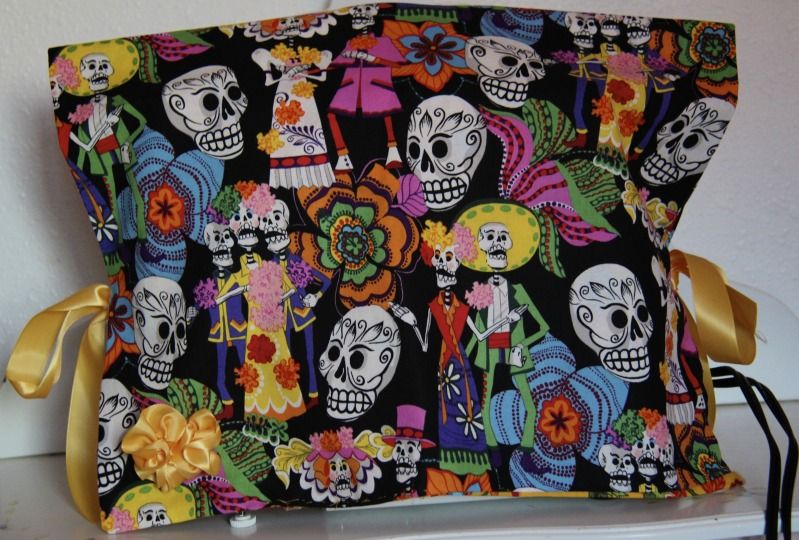
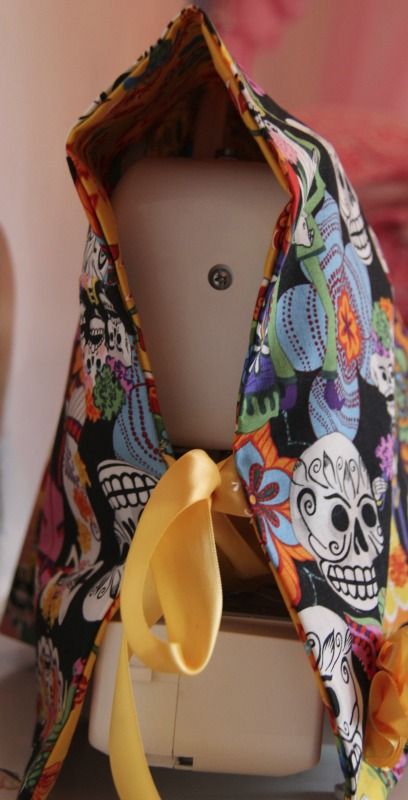
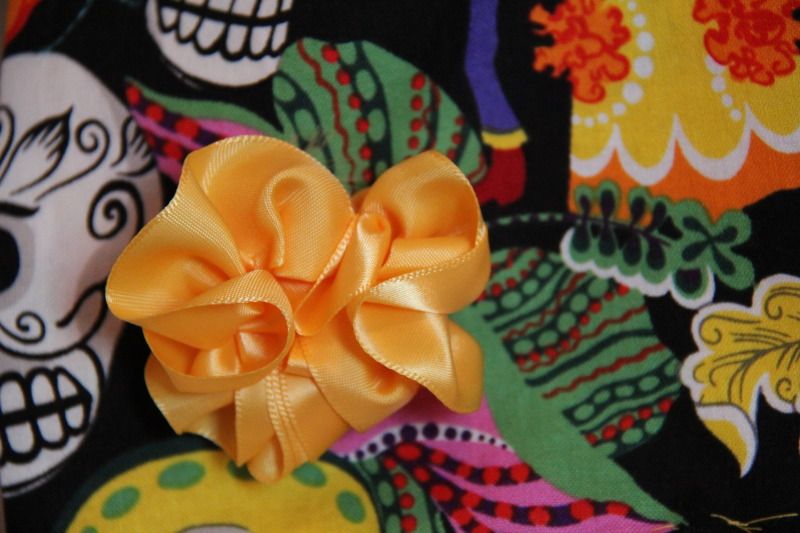
Cap'n Mad Ellen's note: For this project I used Dia de los Muertos' fabric purchased at JoAnns. The reverse fabric was purchased at Walmart and it is 'Jacobean Yellow' from the Heritage Studio. I wanted to add an embellishment as seen in above photo. Searching through the Ebony Oyster's bilge I found golden yellow ribbon very similar in color to 'Cempasuchitl' aka 'flor de muerto'/(marigolds in English). First, make a running stitch on one long edge of the ribbon. Gather into circle and sew together at ends to make a flower. Et voila! A cempasuchitl/marigold flower to embellish my new sewing machine cover!
(Source for marigold flower tutorial: http://cqmagonline.com/vol08iss01/articles/893/index.shtml)
(Text from the website.)
"Supplies Needed:
- 2 pieces of coordinating fabric
- Ribbon
- Thread
- Embellishment (totally optional but it makes it that much cuter!)
Step 1: Cut each piece of fabric to 27” x 15”. I have a pretty standard machine, but you can always check the dimensions of yours and adjust the measurements accordingly.
Step 2: Cut your ribbon into 6 10” pieces. Place your fabric right sides together. On one long end place a piece of ribbon 6” from each side. Pin so that the ribbon is in between the two pieces of fabric like so:
On the other long end pin a piece of ribbon 2 1/2” from each side and again at 9” from each side. Does that make sense? Here’s a diagram:

Step 3: Sew the two pieces of fabric together (right sides together) with ribbons pinned in place, leaving a 3” space for turning (Cap'n ME: First determine which side will be the front of the sewing machine cover then leave a 3" space for turning on the *back* of the cover).
Step 4: Turn the fabric right side out. Press. Top stitch around the edge, making sure to sew the corner you left open.
Step 5: You can add an embellishment if you want. I just added a felt flower, but it can definitely be left plain."
________________________________________________________________________________
________________________________________________________________________________
11 January Year of our Lord 1713
A last minute change due to the fact I left my spool of ribbon at home was replacing it with another golden yellow ribbon that was 1" wide. I may add topstitching later...The main fabric was pieced together on the back (seam to the back) because I forgot to take into consideration that the fabric is printed in one direction. The ends of the ribbon strips were treated with Fray Check.Total price to make this sewing machine cover was approximately US$5.00.
_______________________________________________
¡Buen hecho, Capitàn Mad Ellen!
_________________________________________________________________

Totally gorgeous and perfect for your machine! You did good!!!!
ReplyDelete:)